Running Qwen3-VL with LM Studio
•
LM Studio provides a user-friendly interface and a CLI for running local language models, making it easy to integrate with Eclaire. This guide walks you through installing, configuring, and running models in Eclaire with LM Studio.
This guide requires Eclaire v0.4.0 or above.
What is LM Studio?
LM Studio is a comprehensive platform that simplifies running large language models locally on your machine through three main interfaces: a desktop UI for browsing and managing models, a CLI for automation and scripting, and an OpenAI-compatible API for seamless integration with applications. It provides an intuitive interface for downloading models from Hugging Face and supports both MLX-optimized models for Apple Silicon and GGUF format models, offering flexibility in model selection and deployment.
How Eclaire Uses LM Studio and Qwen3-VL
Eclaire can leverage LM Studio as an AI provider for both backend services and workers. By running LM Studio’s local server, you can process requests entirely on your machine without sending data to external APIs. This approach ensures privacy while giving you full control over model selection, performance tuning, and resource allocation.
With Qwen3-VL, you get a powerful multimodal model that handles multiple AI capabilities in a single package, that Eclaire can leverage for:
- AI Assistant: Natural language conversations and task automation
- Tool Calling: Execute functions and commands through AI-driven workflows
- Document Analysis: Extract insights and information from text documents
- Image Analysis: Understand and analyze visual content
This means you can run one model that covers all these use cases, simplifying your setup and reducing resource requirements.

Eclaire UI showing AI assistant using Qwen3-VL to analyse photos, perform OCR and answer questions.
Step 1: Installation
Install LM Studio using Homebrew (for macOS):
brew update
brew install --cask lm-studio
This installs both the LM Studio desktop application and the lms command-line tool.
LM Studio is available for macOS, Linux, and Windows. For installation instructions specific to your platform, check the official LM Studio documentation.
Step 2: Configure Settings
After installation, launch the LM Studio application and configure the essential settings:
- Open the LM Studio app
- Click the Settings ⚙️ (gear) icon in the bottom-right
- Under Developer / Local LLM Service (headless), check “Enable Local LLM Service” if you want to run it as a server without the LM Studio app open
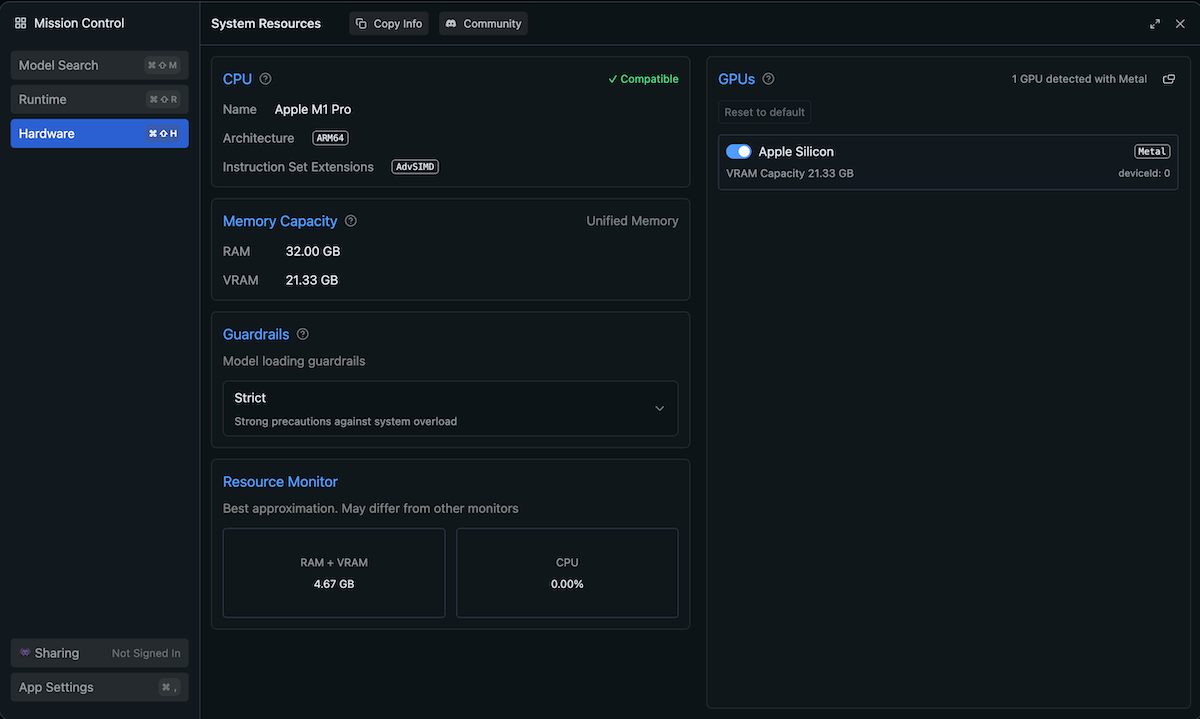
Hardware View
Before downloading models, it’s important to check your available resources. In the Settings view, navigate to the Hardware tab to see your VRAM capacity and available memory. When selecting models to download, ensure you have enough memory available to run them efficiently. Models that exceed your available VRAM will run slowly or may fail to load.
Step 3: Running Models
LM Studio offers two approaches for running models: a graphical user interface for easier model selection and a command-line interface.
Option A: Running Models from the UI
The LM Studio interface makes it easy to discover and run models:
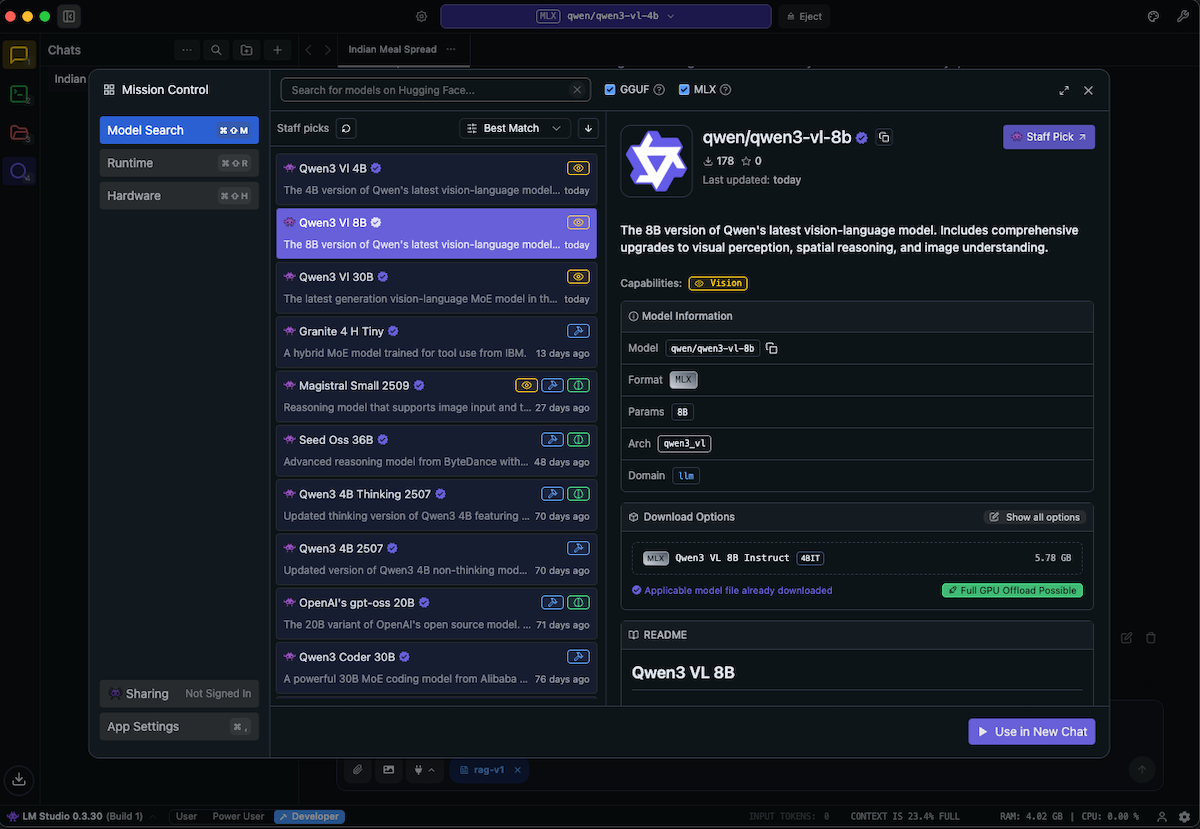
Browse and Search Models
Navigate to the “Discover” tab to browse and search available models from the LM Studio community on Hugging Face. The models browser provides detailed information to help you make informed choices:
- Vision capabilities: Models are clearly marked if they support vision/image understanding
- Model format: See whether models are in MLX format (optimized for Apple Silicon) or GGUF format (compatible with llama.cpp)
- Quantization levels: Different quantization levels (e.g., 4-bit, 8-bit) show the trade-off between model size and quality
- Model sizes: File sizes are displayed so you can ensure you have sufficient storage space
This information helps you select the right model based on your hardware capabilities and use case requirements.
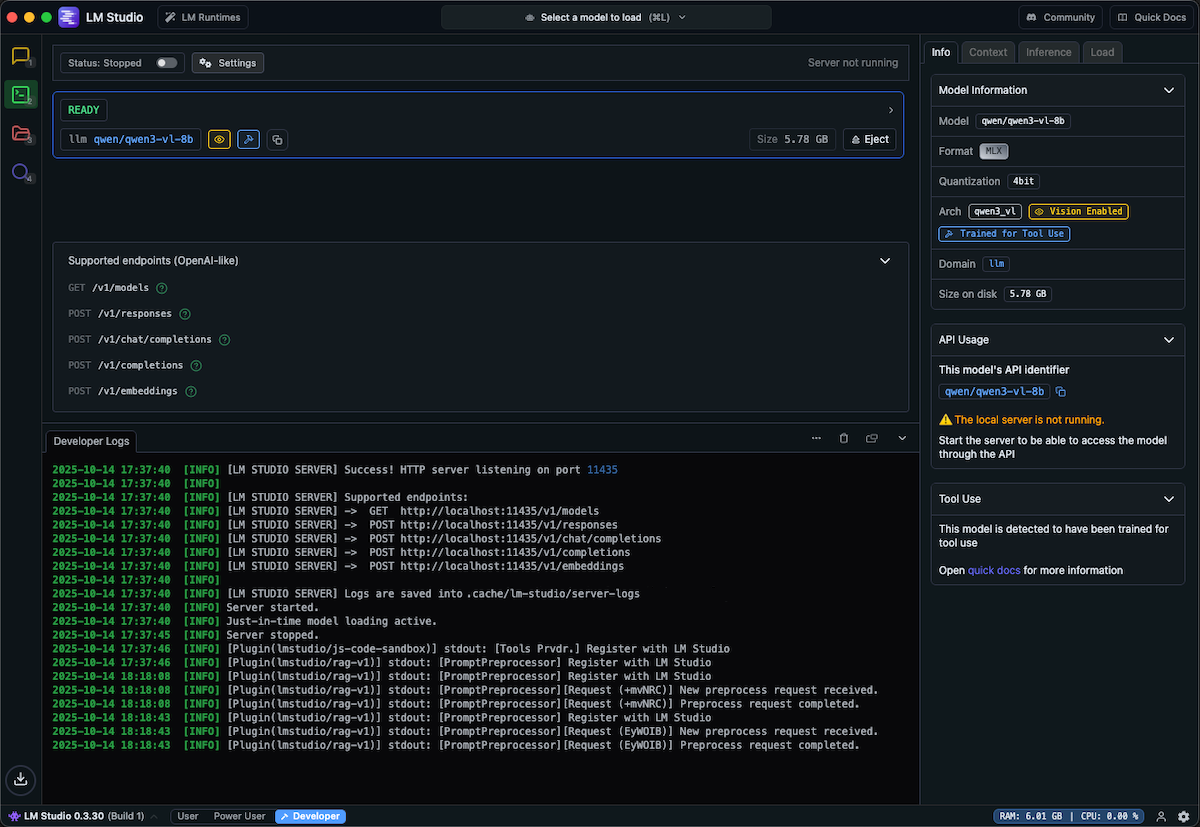
Developer View
The Developer view provides a complete interface for running and managing your local AI server:
- Model selection: Pick from your downloaded models using the dropdown menu
- Load models: Load your selected model into memory with a single click
- Start API server: Launch the OpenAI-compatible API server on your chosen port
- Server logs: Monitor real-time server logs to debug issues and track requests
- Server settings: Configure port, host, and other server parameters
This centralized view makes it easy to manage your local AI infrastructure without touching the command line.
This approach is ideal when you’re experimenting with different models or need visual feedback on resource usage.
Option B: Running Models from the CLI
The LM Studio CLI also allows for browsing, downloading models and controlling the inference server.
Check Available Models
List models already downloaded to your system:
lms lsDownload New Models
Browse and download models from the lmstudio-community on Hugging Face:
lms get "https://huggingface.co/lmstudio-community/Qwen3-VL-8B-Instruct-MLX-4bit"Use lms get --mlx to filter for MLX-optimized models (recommended for Apple Silicon) or lms get --gguf to see GGUF format models compatible with llama.cpp.
Start the Server
Start the LM Studio server on a specific port:
lms server start --port 11434Port 11434 is Eclaire’s default port for backend AI providers. For workers, use port 11435. These are configured in Eclaire’s .env.* files as AI_LOCAL_PROVIDER_URL. In this example, we will have both the backend and workers use the same LM Studio server at port 11434.
Load a Model
Load an existing model into memory:
lms load qwen/qwen3-vl-8bThe model name should match the identifier shown in lms ls.
Verify the Setup
Test that the server and model are working properly:
curl -X POST "http://127.0.0.1:11434/v1/chat/completions" \
  -H "Content-Type: application/json" \
  -d '{
    "messages": [
      {"role": "user", "content": "Hello, how are you?"}
    ],
    "stream": false,
    "max_tokens": 1000
}'
You should receive a JSON response with the model’s reply.
Stopping the Server
When you’re done, stop the server:
lms server stopStep 4: Import and Activate the Model in Eclaire
Once the LM Studio server is running with your chosen model, import it into Eclaire.
Import the model:
./tools/model-cli/run.sh import https://huggingface.co/lmstudio-community/Qwen3-VL-8B-Instruct-MLX-4bitActivate the model:
./tools/model-cli/run.sh activateThe CLI will interactively guide you through the activation process, allowing you to select:
- Whether to activate for backend, workers, or both
- Which provider to use (select LM Studio)
- Which model to activate
To display the active configuration:
./tools/model-cli/run.sh list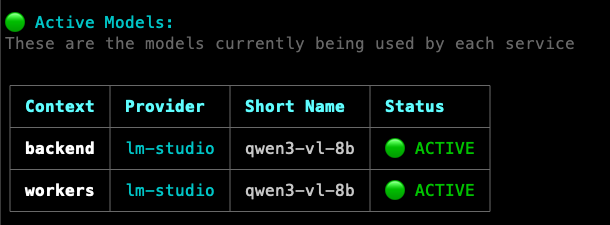
This screenshot shows Qwen3-VL configured with LM Studio as the active provider for both backend and workers.
Restart Eclaire:
After activating the model, restart Eclaire (or the specific service) to pick up the new configuration.
If you’re running multiple AI providers, ensure they’re on different ports. Only one service can listen on each port at a time. If you get a “port already in use” error, check running services with lsof -i :[port] or use pm2 list if managing services with PM2.
What’s Next?
With LM Studio integrated, you can now leverage a wide variety of local language models with Eclaire while maintaining full privacy and control. LM Studio’s intuitive UI makes it easy to experiment with different models, while the CLI tools enable automation and seamless integration.
Try exploring different models from the lmstudio-community to find the best balance of performance, accuracy, and resource usage for your use case.